Quickstart
Connect your tool as a data source, set up an event and send a signed webhook.
Connect your tool to VYG and send your first event. In the app, your tool's connection is a data source. The REST API and MCP tools call it a provider. To set this up over the API instead, see Managing your integration.
1. Add a data source
Open Settings → Data sources and click Add data source. A guided setup asks one question per screen and shows how many steps are left. Once the data source exists, Open full editor at the top of each step opens its page. Answers you gave after the link step are not carried over, so add the event there with Add event.
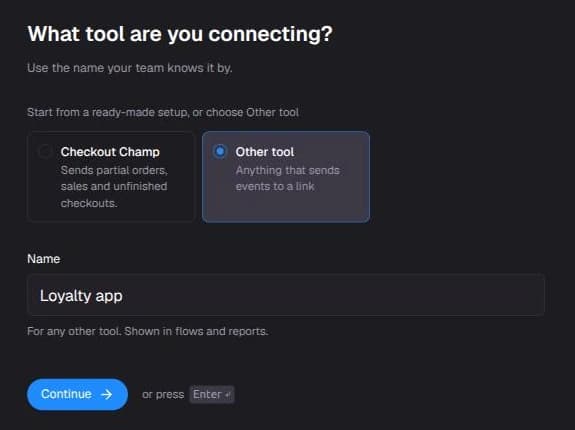
Tool
Choose Checkout Champ for a ready-made setup, or Other tool and enter the name your team knows it by. The data source is created when you continue from this step.
Link and secret
Copy the Webhook URL and the Signing secret into your tool's webhook settings. The signing secret is shown only on this screen, so store it in your secret store now. If you lose it, replace it later from the data source page.
With Checkout Champ, this screen shows a header name and value to add instead, and setup ends here: its events and customer details are already set up.
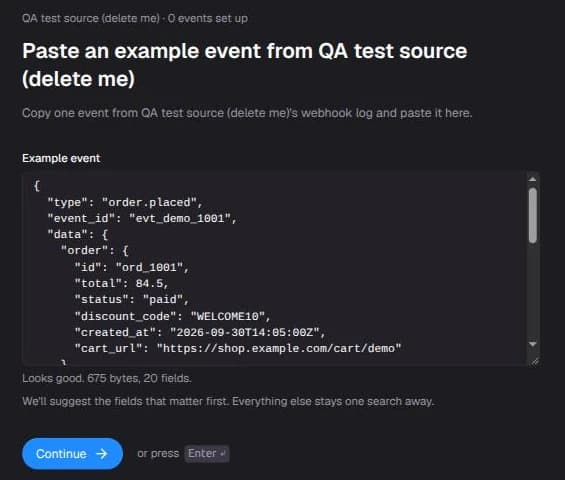
Example event
Paste one event exactly as your tool sends it. VYG checks that it is a single, complete event and reports its size and field count. For this quickstart, paste:
{
	"type": "checkout_abandoned",
	"event_id": "evt_demo_1",
	"data": {
		"id": "ck_001",
		"email": "shopper@example.com",
		"total_price": "42.00"
	}
}
Name it
Name the event as it should appear in flows and reports, for example Checkout abandoned. VYG sets the
event type from the name (checkout_abandoned). Find it later on the event's More tab as Event
type, for API users.
Customer details
Three questions follow: which field is the customer's email, which is the phone number, and which is the order or record ID. VYG preselects the best match from your example and marks it Suggested. Samples are partly hidden.
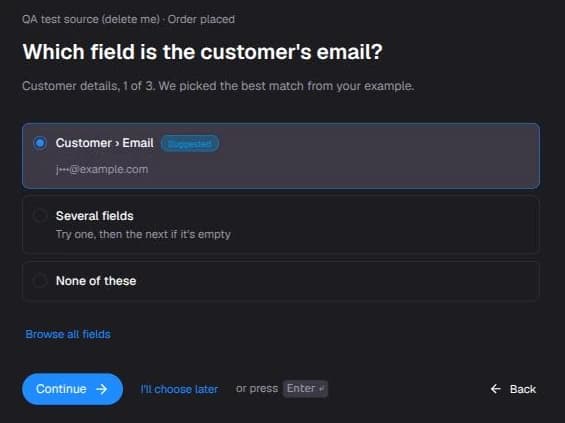
On each question you can also choose:
- Several fields: try one field, then the next if it is empty.
- None of these, or I'll choose later.
- Browse all fields to search the whole example.
An event needs an order or record ID, and an email or a phone. For the example above, choose the id
field as the order or record ID and the email field as the email. It has no phone, so choose None of
these for the phone.
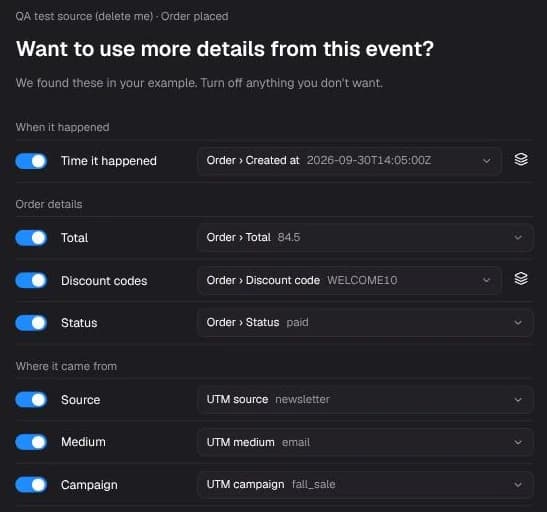
More details and conversation panel
Both steps are optional and only appear when your example has something for them. More details offers the time the event happened, order details, where it came from and other details such as a cart link or items, each prefilled with a switch. Conversation panel offers values your team sees next to the conversation.
Review and finish
Review lists each answer with an Edit link. If something required is missing, it says so and offers Choose it now. Click Finish setup. The last screen confirms that your tool is connected and offers Use in a flow, Add another event and Go to data source.
2. Note your webhook URL
The webhook URL from the Link step has this shape:
POST https://<your-vyg-webhook-host>/custom/{webhookId}It is always on the data source page, next to Webhook URL.
3. Check the event shape
A data source set up with Other tool reads the standard body: type, event_id and the event content
under data. If your tool can only send its own shape, contact your account manager before you go live.
See Webhook Endpoint Reference for the full body and header rules.
4. Send a sample event
With the Signing secret security check, send these headers and a JSON body:
| Header | Value |
|---|---|
content-type | application/json |
x-vyg-signature | Lowercase hex HMAC-SHA256 of the raw body, keyed with your signing secret. |
x-vyg-event-id | A delivery ID. Reuse it when retrying the same delivery. |
x-vyg-topic | The event type, checkout_abandoned here (see Endpoint Reference). |
The JSON body must include type, event_id, and data:
{
	"type": "checkout_abandoned",
	"event_id": "evt_01HZX5K9N2P0Q5R7T9V1W3Y5A7",
	"data": { "id": "ck_001", "email": "shopper@example.com", "total_price": "42.00" }
}
Example request:
SECRET="your-webhook-secret"
URL="https://<your-vyg-webhook-host>/custom/V1StGXR8_Z5jdHi6B-myT"
BODY='{"type":"checkout_abandoned","event_id":"evt_demo_1","data":{"id":"ck_001","email":"shopper@example.com","total_price":"42.00"}}'
SIG=$(printf '%s' "$BODY" | openssl dgst -sha256 -hmac "$SECRET" -hex | sed 's/^.* //')

curl -sS -X POST "$URL" \
  -H "content-type: application/json" \
  -H "x-vyg-topic: checkout_abandoned" \
  -H "x-vyg-event-id: evt_demo_1" \
  -H "x-vyg-signature: $SIG" \
  --data "$BODY"
HMAC Verification has the full algorithm and Node and Python examples.
5. Verify success
A successful request returns 200 OK with ok, custom_event_id and
flow_event_id: null. Open the data source's Activity tab in VYG to see the event and the
customer it matched.
A repeated delivery may return {"deduplicated":true}.
An ok: true response confirms event acceptance. Check the campaign's activity separately for
flow runs and messages. See Triggering flows.
6. Handle retries
Treat the response status as the source of truth:
- 2xx: stop automatic retries.
ok: trueordeduplicated: trueconfirms acceptance. Ifok: falseandreason: "dead_letter", contact VYG support with the event ID. - 4xx: correct the request before retrying. Check the signature, body and integration ID.
- 5xx: retry with increasing delays.
See Errors and retries for status codes and a recommended retry policy.